SO-ARM101 自动标定
在我们仓库lerobot下0.4和0.5版本均更新了自动标定程序,0.5代码目前在dev分支下面,需要更新一下仓库。代码0.4、0.5通用
git pull #更新仓库
pip install -e ".[tools]" # 安装相关插件在lerobot/examples/calibrate下放了我们的命令行入口代码,这个代码调整更多的参数,具体说明参数在下方。建议使用我们的默认参数,速度过快可能导致过载报错
cd lerobot\examples\calibrate
python auto_calibrate_example.py --port COM9 --device-type tele
同时我们也增加了UI页面版本,推荐使用这个进行标定。安装好包之后可以快捷启动
lerobot-auto-calibrate-ui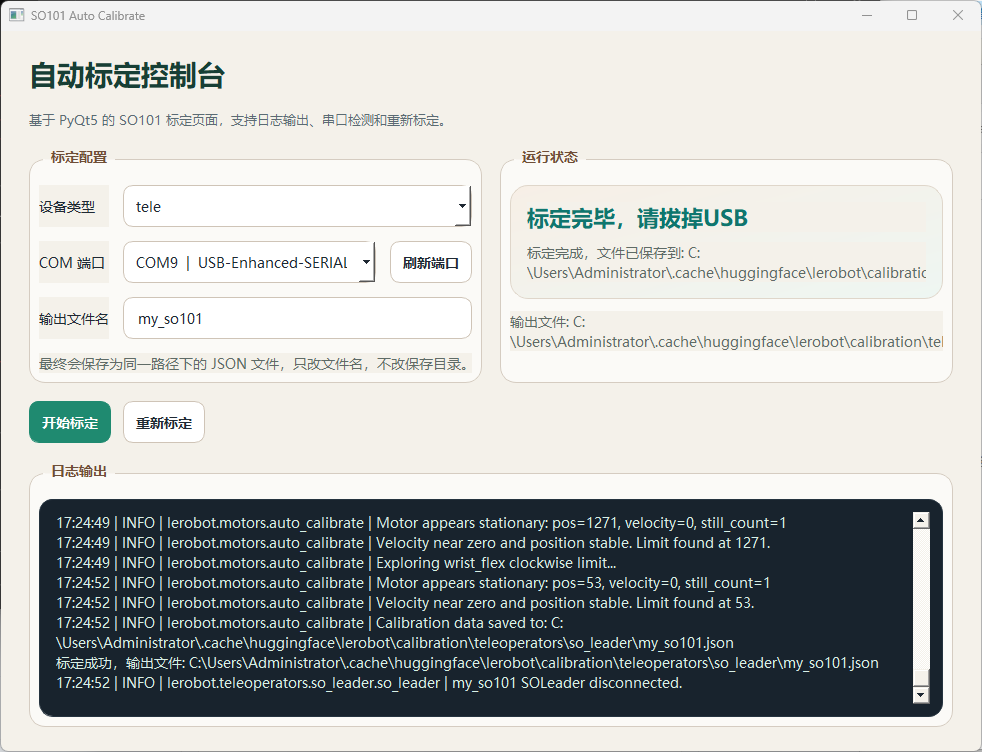
1. Auto Calibrate 使用说明
这个文档说明如何使用 auto_calibrate.py 和 auto_calibrate_example.py 对 SO101 设备执行自动标定。
当前示例脚本已经改成命令行参数模式,支持两类设备:
tele: SO101 leader / teleoperatorrobot: SO101 follower / robot
1.1 功能概览
自动标定脚本会按当前实现流程完成以下工作:
- 连接设备
- 逐个关节探索机械边界
- 计算
homing_offset、range_min、range_max - 生成
MotorCalibration - 保存为 calibration JSON 文件
1.2 相关文件
- auto_calibrate.py: 自动标定核心逻辑
- auto_calibrate_example.py: 命令行入口示例
1.3 命令行参数
必选参数:
--port: 串口号,例如COM9--device-type: 设备类型,只能是tele或robot
可选参数:
--id: 设备 ID,默认是my_so101--calibration-dir: 指定标定文件输出目录--try-torque: 覆盖默认try_torque--max-torque: 覆盖默认max_torque--torque-step: 覆盖默认torque_step--explore-velocity: 覆盖默认explore_velocity--wait-time-s: 覆盖默认wait_time_s--velocity-threshold: 覆盖默认velocity_threshold--position-tolerance: 覆盖默认position_tolerance--log: 是否在终端输出 logger,默认true,例如--log=false--yes: 跳过开始前的回车确认
1.4 默认参数
1.4.1 tele 默认参数
try_torque = 400
max_torque = 500
torque_step = 50
explore_velocity = 600
wait_time_s = 0.5
velocity_threshold = 4
position_tolerance = 4000
1.4.2 robot 默认参数
try_torque = 600
max_torque = 1000
torque_step = 50
explore_velocity = 600
wait_time_s = 0.5
velocity_threshold = 4
position_tolerance = 4000
1.5 终端输入示例
1.5.1 标定 tele
python auto_calibrate_example.py --port COM9 --device-type tele
1.5.2 标定 robot
python auto_calibrate_example.py --port COM3 --device-type robot
1.5.3 指定设备 ID
python auto_calibrate_example.py --port COM9 --device-type tele --id my_so101
1.5.4 覆盖默认扭矩参数
python auto_calibrate_example.py --port COM9 --device-type tele --try-torque 300 --max-torque 450
1.5.5 覆盖多个参数
python auto_calibrate_example.py --port COM3 --device-type robot --try-torque 500 --max-torque 800 --explore-velocity 500 --wait-time-s 0.7
1.5.6 跳过确认提示
python auto_calibrate_example.py --port COM9 --device-type tele --yes
1.5.7 关闭终端 logger 输出
python auto_calibrate_example.py --port COM9 --device-type tele --log=false
1.6 执行流程
运行脚本后,大致流程如下:
- 根据
--device-type创建对应配置对象 tele使用SO101LeaderConfigrobot使用SO101FollowerConfig- 根据设备类型加载对应默认标定参数
- 如果命令行给了可选参数,则覆盖默认值
- 默认会在终端输出 logger,传
--log=false可关闭 - 连接设备并执行自动标定
- 保存标定结果到设备对应的 calibration 文件路径
1.7 输出结果
标定成功后,终端会输出每个电机的结果,例如:
电机: shoulder_pan
ID: 1
Homing Offset: -1396
Range Min: 620
Range Max: 3440
保存后的 JSON 结构类似:
{
"shoulder_pan": {
"id": 1,
"drive_mode": 0,
"homing_offset": -1396,
"range_min": 620,
"range_max": 3440
}
}
1.8 常见说明
1.8.1 MotorCalibration 是什么
标定函数最终会返回 MotorCalibration 对象,内部字段包括:
iddrive_modehoming_offsetrange_minrange_max
访问方式例如:
print(calibration.id)
print(calibration.homing_offset)
print(calibration.range_min)
print(calibration.range_max)
1.8.2 tele 和 robot 的区别
tele默认扭矩更保守robot默认扭矩更大,适合 follower 负载场景
1.8.3 start_torque
当前版本的自动标定逻辑里,主要实际使用的是:
try_torquemax_torquetorque_step
如果你在调参数,优先关注这几个。
1.9 安全建议
开始标定前建议确认:
- 机械臂周围没有障碍物
- 电源稳定
- 串口连接正常
- 知道如何快速断电
- 肩部和肘部等大负载关节先用更保守参数测试
如果出现类似 OverEle error、过流、卡死、持续顶住边界等现象,先降低:
try_torquemax_torqueexplore_velocity
1.10 推荐调参起点
如果设备容易过流或撞边界太猛,可以先尝试:
1.10.1 对 tele
python tools/auto_calibrate_example.py --port COM9 --device-type tele --try-torque 300 --max-torque 400 --explore-velocity 400
1.10.2 对 robot
python tools/auto_calibrate_example.py --port COM3 --device-type robot --try-torque 400 --max-torque 600 --explore-velocity 400